TypeScript is tremendously helpful while developing Node.js applications. Let’s see how to configure it for a seamless development experience.
Setting up TypeScript
First, we need to install TypeScript. We can do this by running the following command:
npm i -D typescript
Next, we need to create a tsconfig.json file in the root of our project. This file will contain the TypeScript configuration for our project. Here is an example of a tsconfig.json file that I picked from Total TypeScript and added a few more things (read the code and pay attention to the comments):
{ "compilerOptions": { /* Base Options: */ "esModuleInterop": true, "skipLibCheck": true, "target": "es2022", "allowJs": true, "resolveJsonModule": true, "moduleDetection": "force", "isolatedModules": true, "verbatimModuleSyntax": true, /* Setting ~ as the alias for the src/ directory */ "baseUrl": ".", "paths": { "~/*": ["src/*"] }, /* Strictness */ "strict": true, "noUncheckedIndexedAccess": true, "noImplicitOverride": true, /* If transpiling with TypeScript: */ "module": "NodeNext", "outDir": "dist", "sourceMap": true, /* AND if you're building for a library: */ "declaration": true, /* AND if you're building for a library in a monorepo: */ "composite": true, "declarationMap": true, /* If NOT transpiling with TypeScript: */ "module": "preserve", "noEmit": true, /* If your code runs in the DOM: */ "lib": ["es2022", "dom", "dom.iterable"], /* If your code doesn't run in the DOM: */ "lib": ["es2022"], }, /* I'm considering all your code is in src/ */ "include": ["src/**/*.ts"]}
Setting up the build script
Next, we need to set up a build script that will compile our TypeScript code to JavaScript. First, install tsc-alias to handle the aliases we defined in the tsconfig.json file:
npm i -D tsc-alias
Then, you can add the build script by adding the following script to our package.json file:
{ "scripts": { "build": "tsc && tsc-alias" }}
Setting up the development script
Next, we need to set up a development script that will watch for changes in our TypeScript files and recompile them. Personally, I like to use tsx, as it provides a much faster development experience compared to the built-in TypeScript watcher or ts-node. First, install tsx:
npm i -D tsx
Then, you can add the dev script (in order to start the project in development mode) by adding the following script to your package.json file:
Yes, you won’t get typechecks while developing using tsx, but you can run npm run build for that or add a new typecheck scripts to your package.json, and run it whenever you want to check for type errors:
TL; DR: No. Please add node_modules to your .gitignore file:
node_modules
But, why?
The node_modules directory is where your package manager (that can be npm, yarn or pnpm) will install all the project dependencies listed on your package.json. Regardless of the package manager you choose, a lockfile (package-lock.json, yarn.lock or pnpm-lock.yaml, respectelly) will be generated in the first time you install your project dependencies, describing the entire dependency tree. This way, every time you need to reinstall your project dependencies, you shall get the exact same files.
The lockfile should be commited to git, enabling the re-installation of the tree of dependencies in any other ambient, what makes unecessary to commit the node_modules directory to git (also, it cuts the size of your repository by a lot, as node_modules can consumes gigabytes of space).
JSX is an excellent abstraction for building web interfaces. Introduced by Facebook and popularized by React, it’s an extension of JavaScript designed to abstract nested function calls. It’s expected that JSX code will be pre-processed (transpiled) into valid JavaScript before being executed in browsers or environments like Node.js.
Project Setup
First of all, let’s start our project and install the necessary dependencies:
npm init -ynpm i fastify react react-domnpm i -D @types/node @types/react @types/react-dom tsx typescript
Now, we set up the scripts for our project. The package.json should look like this:
The React ecosystem already provides the necessary tools for rendering our components to HTML and sending them directly from the server to our client. So, first, let’s create the root component:
// src/components/index.tsxexport function App() { return ( <h1>Hello, World!</h1> )}
Configuring Fastify to Render Our React Component
As we don’t intend to load React to hydrate our HTML on the client side, we can use the renderToStaticMarkup function exported from react-dom/server. Our server initialization file will look like this:
If you start the project now (npm run dev), you should see the page at http://localhost:3000. Of course, we can enhance our implementation by using the new streaming API, introduced in React 18 (which is the recommended method). To do that, we will make the following changes to our code:
You can create hashes in Node.js without the need to install any external library. Usually, I create the following utility function in the projects I work on:
And I use it to replace the md5 library whenever I come across it.
Note that you can create hashes for any algorithm supported by the OpenSSL version on your platform. On Linux and Mac, you can see which algorithms are available with the command openssl list -digest-algorithms.
First described in the classic geometry book Elements, by the ancient Greek mathematician Euclid (ca. 300 BC, at the book VII, proposition 2), the method of finding de greatest common divisor between the positive numbers a and b, being a>b consists on the knowledge that the common divisors of a and b are the same of a−b and b. Therefore, we can find this greatest common divisor by replacing the largest number (a) by the different between the two numbers (a−b), repeatedly, until the two numbers are equal. In TypeScript, we can do that like this:
const gcd = (a: number, b: number): number => { // When `a` is equal to `b`, return the result if (a === b) { return a } // When `a` is bigger than b, calculate the the GCD again // with the new `a` being `a - b`. if (a > b) { return gcd(a - b, b) } // If the new `b` is bigger than `a`, // subtract a from it. return gcd(a, b - a)}
This method can be very slow if the difference between a and b is too large. Thankfully, there’s another method to find the greatest common divisor between two numbers, that can be described as follows:
In order to find the greatest common divisor between a and b, being a>b, perform the division between the two numbers. This operation will give a quotient and a remainder (that we will call q and r, respectively). Thus, a can be described as a=q×b+r;
If r is equal to 0, we stop, because we found that the greatest common divisor of a and b is b. Otherwise, we go back to step 1, making b the new a and r will be the new b.
Now, we can start with the implementation of the algorithm above:
const gcd = (a: number, b: number): number => { // First, we take the remainder between the division of a and b: const r = a % b // If the remainder is equal to zero, it means that we already found the // greatest common divisor, therefore, we return b: if (r === 0) { return b } // If the remainder is not equal to 0, we call the function again // with the new values for a and b: return gcd(b, a % b)}
The implementation is very straightforward and can be read exactly as is described in steps 1 and 2. We can make the function simpler, by checking, directly, if b is equal to zero and only doing the remainder operation afterwards. Therefore, if the function receive a b that is equal to zero, we will know that a is the greatest common divisor:
const gcd = (a: number, b: number): number => { if (b === 0) { return a } return gcd(b, a % b)}
This variant is called Euclidean algorithm (in contrast of the first one, which is the Euclid’s algorithm) and it significantly faster than the first implementation.
Alternative implementations
We can also take a different approach. Instead of calling our gcd function recursively, we can implement our function using a while loop (analogous to our first implementation above):
const gcd = (a: number, b: number): number => { // Run this loop while a is different of b while (a !== b) { if (a > b) { // Subtracts b from a while a is bigger than b a = a - b // Go to the next loop continue } // Subtracts a from b when a <= b b = b - a } // Returns the greatest common divisor between a and b return a}
And this is another way (analogous to our second implementation above):
const gcd = (a: number, b: number): number => { // Run this loop while `b` is different from 0 while (b !== 0) { // Save the new value for a in a temporary variable const newA = b // Set b to the modulo of a and b (the remainder of the division between a and b) b = a % b // Set a to its new value before the next loop a = newA } // Now that b is equal to 0, we know that a is the greatest common divisor return a}
Finding the greatest common between three or more numbers
The greatest of three or more numbers is equal the product of the prime factors common to all the numbers (we will explore more of that in a future article), but, you can also calculate the greatest common divisor between pairs of this list of numbers with the same functions we have showed already. So, let’s refactor our gcd function to receive multiple parameters:
const gcd = (...numbers: number[]): number => { const calculateGcd = (a: number, b: number): number => { if (b === 0) { return a } return calculateGcd(b, a % b) }; return ( numbers // Just to be sure, sort numbers in descendant order: .sort((a, b) => b - a) // Call `calculateGcd` for each pair in the numbers array: .reduce((a, b) => calculateGcd(a, b)) )}
Validating our input
Let’s guarantee that our functions should always receive, at least, two numbers and that all numbers must not be negative:
const gcd = (...numbers: number[]): number => { if (numbers.length < 2) { throw new Error("You must pass, at least, 2 numbers") } if (numbers.some((number) => number < 0)) { throw new Error("The numbers must be >= 0") } const calculateGcd = (a: number, b: number): number => { if (b === 0) { return a } return calculateGcd(b, a % b); }; return ( numbers // Just to be sure, sort numbers in descendant order: .sort((a, b) => b - a) // Call `calculateGcd` for each pair in the numbers array: .reduce((a, b) => calculateGcd(a, b)) )}
Consider the following function that calculates the factorial of a number:
const factorial = (n) => { let result = 1; while (n > 1) { result *= n; n--; } return result;};
Factorial
In Mathematics, the factorial of a non-negative integer (n!) is the product of all positive integers less than or equal to n.
The function above was implemented iteratively, that is, it uses a loop to calculate the factorial of a number. However, it is possible to implement the same function recursively (that is, a function that references itself):
const factorial = (n) => { if (n === 0) return 1; return n * factorial(n - 1);};
The result of both functions is the same, however, the iterative function is much more efficient (in JavaScript) than the recursive function. In addition, if we try to calculate the factorial of a very large number, we encounter the error RangeError: Maximum call stack size exceeded. Let’s understand why this happens and how we can improve the recursive function.
Call Stack
A call stack is a data structure that stores information about a program’s functions. When a function is called, it is added to the execution stack, as well as all the functions it calls. When a function returns, it is removed from the execution stack. Each function added to the stack is called a stack frame.
In order to understand what is happening, let’s try to represent, graphically, how the calculation of the factorial of 6 is done with the iterative function:
Now, compare it with the substitution model for calculating the factorial of 6 using the recursive function:
Note that, in the iterative function, the arrow shape is linear and we can see the state of each variable at each step. In addition, at each iteration of our loop, a calculation is performed and the variables stored in memory are updated. In the recursive function, the arrow shape is exponential and we cannot see the state of all variables in the first half of the processing. In addition, each time the function is executed, more memory needs to be used to store the resulting values of each execution.
But what does this mean? In order for JavaScript to calculate the factorial of 6 using the iterative function, the while condition is added to the stack, where its calculation is performed, the result variable is updated, and then the executed code block of the while is removed from the stack. This is done until the while condition is false, that is, until the value of n is less than or equal to 1.
In the recursive function, each call to the factorial function is added to the stack as many times as necessary until the if condition is false, that is, until the value of n is less than or equal to 1. This means that, to calculate the factorial of 6, the factorial function is added to the stack 6 times before being executed. And that’s why, when we try to calculate the factorial of a large number (100,000, for example), we encounter the error RangeError: Maximum call stack size exceeded: there is not enough space in the stack to store all the calls to the factorial function.
[…] whenever the last thing a function does is call another function, then this last function does not need to return to its caller. As a consequence, no information needs to be stored on the call stack and the function call is more like a goto (a jump). This type of call is called a tail call; not increasing the stack is called tail call optimization (TCO).
Now, we have discovered that our factorial calculation function is not tail recursive. But how can we make it tail recursive? With the help of another function:
Now, our function is tail recursive: the last thing it does is call a function (and not calculate an expression, as in the first implementation). Now, let’s see the substitution model for calculating the factorial of 6 with our new factorial function:
The performance is superior to our first implementation, although it still doesn’t beat the performance of the iterative function. However, we still encounter the error RangeError: Maximum call stack size exceeded. But why does this happen? Because, despite our function being tail recursive, current versions of Node.js and browsers (with the exception of Safari) do not implement Tail Call Optimization (despite its inclusion in the EcmaScript specification since 2015).
But how will we solve this problem? With the help of another function, of course! For that, we will rely on the Trampoline pattern:
Our trampoline function consists of a loop that invokes a function that wraps another function (what we call a thunk) until there are no more functions to execute. Let’s see how the implementation of our factorial function would look like with the Trampoline pattern:
const trampoline = (fn) => { while (typeof fn === "function") { fn = fn(); } return fn;};const factorialHelper = (x, accumulator) => { if (x <= 1) { return accumulator; } // Now, a function returns another function return () => factorialHelper(x - 1, x * accumulator);};const factorial = (n) => { return trampoline(factorialHelper(n, 1));};
And now, we can call our factorial function with a large number, without encountering the error RangeError: Maximum call stack size exceeded. Of course, depending on the factorial we want to calculate, we will encounter an Infinity, as it is a very large number (a number greater than Number.MAX_SAFE_INTEGER: 253 - 1). In this case, we can use BigInt:
Using custom dialog elements instead of native browser implementations, such as alert,
confirm, or prompt,
has become the standard for web development for quite some time (popularized by various jQuery plugins and by Bootstrap itself), so that with every new UI library that emerges[1][2][3], it is common for its authors to re-implement a modal with the framework of the moment (which may or may not implement WAI-ARIA accessibility).
But now, with the arrival of the <dialog> element in HTML5 (supported by 93.85% of browsers in use), it is much easier to create dialogs natively. In this article, we will see how to create a simple modal (and non-modal) dialog with the <dialog> element.
Understanding the dialog element
In the sense employed in user interface development, a dialog is a conversation between the system and the user, where the system expects a response from the user to continue. A dialog can be modal or non-modal. A modal dialog (that is, one that changes the mode of interaction of the user with the system) is one that locks the interface, preventing the user from interacting with the rest of the page until it is closed. A non-modal dialog (that is, one that does not change the mode of interaction of the user with the system), on the other hand, allows the user to interact with the rest of the page while the dialog is open.
The simplest way to put a non-modal dialog on the screen is as follows:
Note the form, on line 5, with the dialog method. It is this form that sends actions to the dialog. It will be displayed like this:
What makes the example above a non-modal dialog is the use of the open attribute (line 1), which also makes it unable to be closed with the Esc key. It’s possible to create a non-modal dialog using the JavaScript API:
In order for it to behave like a modal, it is necessary to open it through its JavaScript API, as we will see next.
This time, we open and close the modal with JavaScript and put the form result in the output element when the modal is closed. Read the code carefully and try to understand what is happening.
Styling the modal
The dialog element can (of course), be styled like any other HTML element. However, note that, to style the overlay (the dark background behind the modal), it is necessary to use the ::backdrop selector:
Polyfill
If you want to use dialog and don’t have compatibility issues in older browsers, you can use this polyfill.
Since fetch) is pratically universally supported on the most used web browsers, we may safely drop the use Axios and other similar libraries in favor of fetch. In this article, I’ll create a little wrapper for fetch that adds some conveniences to improve the developer experience.
The code
First, I will create a base function from where all the other shall be derived:
// Extends the error class to throw HTTP Errors (any response with status > 299)class HTTPError extends Error {}// A generic type to type the response// -----------\/const query = <T = unknown>(url: RequestInfo | URL, init?: RequestInit) => fetch(url, init).then((res) => { if (!res.ok) throw new HTTPError(res.statusText, { cause: res }) return res.json() as Promise<T> // <--- Applying the generic type above })
In the code above, we:
Created a new HTTPError class, in order to throw HTTP Errors as they appear;
Use a generic type in order to be able to type the response of the request.
Now, let’s extend the query function to enable us to serialize and send data on our requests:
const makeRequest
  // -----------\/ RequestInit['method'] is a union of all the possible HTTP methods
  = (method: RequestInit['method']) =>
    //     | Those two generic types enables us to type the
    // \/--  data input (TBody) and output (TResponse) of the function.
    <TResponse = unknown, TBody = Record<string, unknown>>(url: RequestInfo | URL, body: TBody) =>
      query<TResponse>(url, {
        method,
        body: JSON.stringify(body), // <-- JSON Stringify any given object
      })
In the code above, we:
We build a closure that, first, receive the method we want to call and then returns a function where we pass the url and the body (which is, by default, JSON-stringified) of the request.
At this point, we can use our newly created functions like this:
// Adding type for the Product entitytype Product = { id: number title: string description: string price: number discountPercentage: number rating: number stock: number brand: string category: string thumbnail: string images: string[]}// Getting a single productconst product = await query<Product>('https://dummyjson.com/products/1')console.log(product)// Creates a function that makes POST requestsconst post = makeRequest('POST')// Adding a new productconst newProduct = await post<Product, Omit<Product, 'id'>>('https://dummyjson.com/products', { title: 'New Product', description: 'This is a new product', price: 100, discountPercentage: 0, rating: 0, stock: 0, brand: 'New Brand', category: 'New Category', images: [], thumbnail: '',})console.log(newProduct)
Fully functional, but not very “ergonomic”. I believe that our code should also be able to accept a base URL for all the requests, make it easier to add things on the header (like an authorization token) and an easy way to make PATCH, PUT and DELETE requests.
Let’s refactor the code above in order to make it easy to add a base URL and pass a common header to all requests:
import { getToken } from 'my-custom-auth'class HTTPError extends Error {}const createQuery = (baseURL: RequestInfo | URL = '', baseInit?: RequestInit) => <T = unknown>(url: RequestInfo | URL, init?: RequestInit) => fetch(`${baseURL}${url}`, { ...baseInit, ...init }).then((res) => { if (!res.ok) throw new HTTPError(res.statusText, { cause: res }) return res.json() as Promise<T> })// This is the function where we define our base URL and headersconst query = createQuery( 'https://dummyjson.com', { headers: { 'Content-Type': 'application/json', 'Authorization': `Bearer ${getToken()}`, // If you need to add a token to the header, you can do it here. }, })const makeRequest = (method: RequestInit['method']) => <TResponse = unknown, TBody = Record<string, unknown>>(url: RequestInfo | URL, body: TBody) => query<TResponse>(url, { method, body: JSON.stringify(body), })export const api = { get: query, post: makeRequest('POST'), delete: makeRequest('DELETE'), put: makeRequest('PUT'), patch: makeRequest('PATCH'),}
In the code above, I:
Created a createQuery function, a closure where I can set a default url and init parameters;
Created a new query function, where I use the createQuery function to define the base URL and the default parameters that all requests should have (note the dummy getToken function that adds a Bearer Token to each request);
In the end, I export the api object all the commonly used function to make requests.
You may want to return the body of a request that returned an error, like, for example, when your backend returns the standardized problem details. So, the refactored code would be:
import { getToken } from 'my-custom-auth'// Extends the return of the HTTPError classclass HTTPError extends Error { readonly response: any; readonly status: number; readonly statusText: string; constructor(status: number, statusText: string, response: any) { super(statusText); this.status = status; this.statusText = statusText; this.response = response; }}const createQuery = (baseURL: RequestInfo | URL = '', baseInit?: RequestInit) => <TResponse = unknown>(url: RequestInfo | URL, init?: RequestInit) => fetch(`${baseURL}${url}`, { ...baseInit, ...init }).then(async (res) => { // Now, we get the JSON response early const response = await res.json() if (!res.ok) throw new HTTPError(res.status, res.statusText, response); return response as TResponse })// In this function, we define our base URL and headers.const query = createQuery( 'https://dummyjson.com', { headers: { 'Content-Type': 'application/json', 'Authorization': `Bearer ${getToken()}`, // If you need to add a token to the header, you can do it here. }, })const makeRequest = (method: RequestInit['method']) => <TResponse = unknown, TBody = Record<string, unknown>>(url: RequestInfo | URL, body: TBody) => query<TResponse>(url, { method, body: JSON.stringify(body), })export const api = { get: query, post: makeRequest('POST'), delete: makeRequest('DELETE'), put: makeRequest('PUT'), patch: makeRequest('PATCH'),}
And now, you can use your new wrapper around fetch like this:
type Product = { id: number title: string description: string price: number discountPercentage: number rating: number stock: number brand: string category: string thumbnail: string images: string[]}// GET https://dummyjson.com/products/1api .get<Product>('/products/1') .then(console.log) .catch((err) => { if (err instanceof HTTPError) { // Handle HTTP Errors console.error('HTTPError', err); } if (err instanceof SyntaxError) { // Handle error parsing of the response console.error('SyntaxError', err); } console.error('Other errors', err);});
Final thoughts
The code above is not full-featured as Axios, redaxios, ky or wretch, but, most of the time, it is all need when I’m working with React using SWR or TanStack Query (and on the backend too). Give me your thoughts about the code and show me your improvements (if you want). You can access this code on this gist.
In computer science, a first-class citizen is an entity that supports all operations available to other entities. Some of the available operations are:
They may be named by variables;
They may be passed as arguments to procedures;
They may be returned as the results of procedures;
They may be included in data structures.
It was the British computer scientist Christopher Strachey (1916-1975) who first coined this notion of first-class citizen status of elements in a programming language in the 1960s.
In JavaScript, for example, functions are first-class citizens, as all of the operations cited above can be applied to them. Let’s see some examples:
A simple function definition in JavaScript
function sum(a, b) { return a + b}
Assigning a constant to a function
const sum = (a, b) => a + b// or// // const sum = function (a, b) {// a + b// }
Passing a function as an argument
function sum(a, b, callback) { const result = a + b if (typeof callback === 'function') { callback(result) // pass the result as an argument of `callback` } return result}// Pass `console.log` as the callback function// -------\/sum(2, 2, console.log) // => 4
Return a function
function sum(a, b, callback) { const result = a + b if (callback) { return () => callback(result) } return result}// The callback is the sum of the result with 2.// ------------------\/const fn = sum(2, 2, (result) => sum(2, result))// ^---- Store the returned function in a variable// Execute the function// ---------\/console.log(fn()) // => 6
Including a function in a data structure
// Store the basic operations in an objectconst operations = { sum: (a, b) => a + b, sub: (a, b) => a - b, mul: (a, b) => a * b, div: (a, b) => a / b,}
Recently, I created a package with the ESLint settings I like to use in my React projects, as I was tired of always having to configure it when I start new React projects. Publishing a NPM package is just a matter of running npm publish on the directory of your package (considering, of course, that you already have an NPM account and is authenticated on your terminal). But I wanted to automatize this publishing everytime I created a new release.
In order to do that, I used the following GitHub Action:
# File: .github/workflows/npm-publish.yml# This workflow will publish a package to NPM when a release is created# For more information see: https://help.github.com/actions/language-and-framework-guides/publishing-nodejs-packagesname: Publish Package to npmjson: release: types: [created]jobs: build: runs-on: ubuntu-latest steps: - uses: actions/checkout@v3 - uses: actions/setup-node@v3 with: node-version: 16 registry-url: https://registry.npmjs.org/ - run: npm publish env: NODE_AUTH_TOKEN: ${{secrets.NODE_AUTH_TOKEN}}
If you read the YAML file above (that you should put on the .github/workflows/npm-publish.yml directory of your git repository), you should have noted that the environment variable NODE_AUTH_TOKEN should be defined. Create a new automation access token on the control panel of NPM:
Access your NPM account and click in “Access tokens”:
Name your new access token and select the “Automation” type for it:
Go to your GitHub repository, click in “Settings > Secrets > Actions > New repository secret”, name it as NODE_AUTH_TOKEN and paste the access token you just got from NPM:
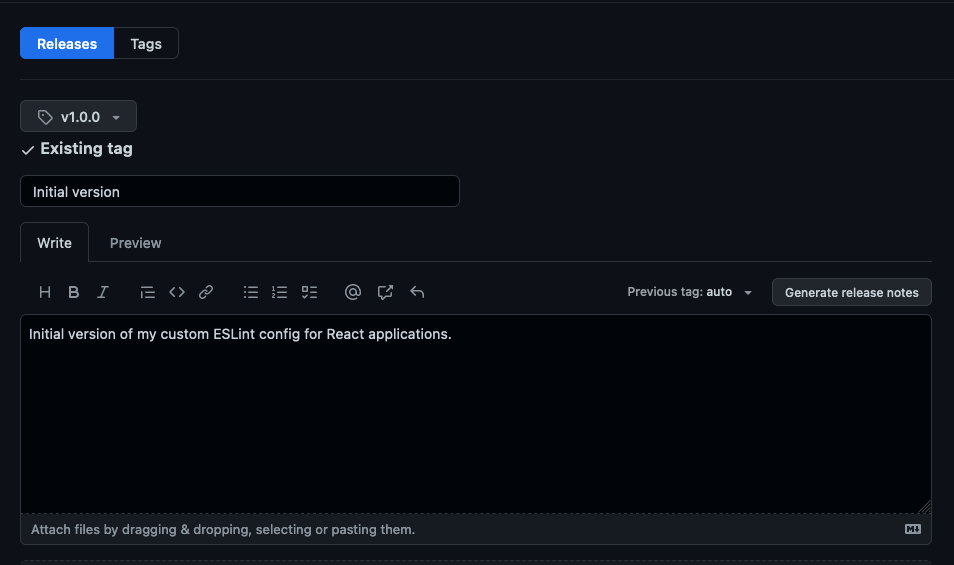
Create a new release for your package. This should trigger our GitHub Action and publish to NPM.